Since the lada has now gone to the great scrapyard in the sky, there is no point keeping this blog alive
So I have merged both this and the caravan blog and started a new one
http://kernowlife.blogspot.com/
Please can you update your bookmarks accordingly
Saturday, July 9, 2011
Thursday, June 23, 2011
Off on a Tangent.....
Since the Mondeo has now gone, I needed some cheap transport whilst waiting for some cash to come in, so
I recently bought this scooter for £80 and thought is was going to be a simple bolt on the battery, re attach the panels, MOT and Bobs your uncle.
Yeah Right.
it's supposed to look like this
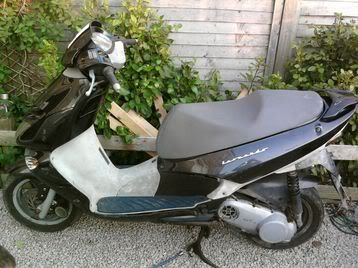
However it arrived looking like this.

Now after some initial numptyness
http://www.scootershack.co.uk/the-workshop/aprillia-leonardo-starting-problems-t23458.html
We got to the stage of trying to start part 2http://www.scootershack.co.uk/the-workshop/aprilia-leonardo-125-starting-problems-part-2-t23528.html
Since then, the starter motor came out and the first evidence of previous botched restorations. There was only 1 bolt in the starter, the other had sheared.
Took the starter out (with my dad) and cleaned it all out, it was completely choked with carbon. Re assembled and tested.....working fine (Thank god, not really in a position to fork out £90 for a replacement (or £400+ for a genuine aprilia one )
)
Re positioned it and yeah.....it still works...............just doesn't engage in the engine
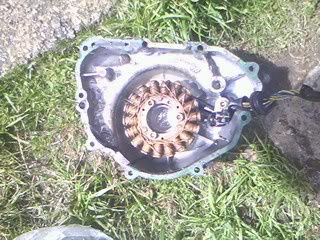
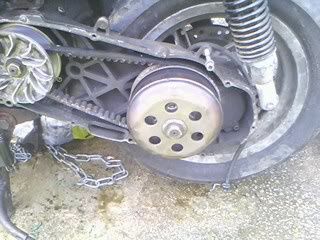
Took the belt cover off and found that the back wheel end of the belt spins but the front part (fan?) doesn't
Then took off the other side and found everything jammed.........Oh no, not a seized engine I hope.
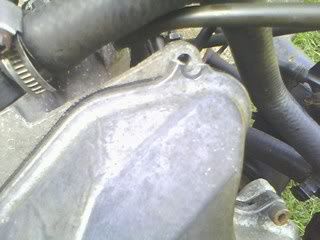
The plan now is to drop the engine, however I am seriously hampered by the number of rounded and seized nuts and bolts. (more bodged restorations?)
Will take some more photo's tomorrow and post them as they might make more sense than my ramblings.
This job has gone from a simple fix up job to a full on restoration.
So as not to hijack this blog, further updates on the scooter can be found at http://www.scootershack.co.uk/scooter-projects/aprilia-leonardo-125-project-t23560.html
I recently bought this scooter for £80 and thought is was going to be a simple bolt on the battery, re attach the panels, MOT and Bobs your uncle.
Yeah Right.
it's supposed to look like this
However it arrived looking like this.
Now after some initial numptyness
http://www.scootershack.co.uk/the-workshop/aprillia-leonardo-starting-problems-t23458.html
We got to the stage of trying to start part 2http://www.scootershack.co.uk/the-workshop/aprilia-leonardo-125-starting-problems-part-2-t23528.html
Since then, the starter motor came out and the first evidence of previous botched restorations. There was only 1 bolt in the starter, the other had sheared.
Took the starter out (with my dad) and cleaned it all out, it was completely choked with carbon. Re assembled and tested.....working fine (Thank god, not really in a position to fork out £90 for a replacement (or £400+ for a genuine aprilia one
)Re positioned it and yeah.....it still works...............just doesn't engage in the engine
Took the belt cover off and found that the back wheel end of the belt spins but the front part (fan?) doesn't
Then took off the other side and found everything jammed.........Oh no, not a seized engine I hope.
The plan now is to drop the engine, however I am seriously hampered by the number of rounded and seized nuts and bolts. (more bodged restorations?)
Will take some more photo's tomorrow and post them as they might make more sense than my ramblings.
This job has gone from a simple fix up job to a full on restoration.
So as not to hijack this blog, further updates on the scooter can be found at http://www.scootershack.co.uk/scooter-projects/aprilia-leonardo-125-project-t23560.html


Wednesday, June 1, 2011
No wonder Welding is so bloody expensive
I've been putting it off and putting it off, but I couldn't put it off any longer. I've had to have a go at this welding lark.
Following a link from the Lada forum, I found this site
http://www.mig-welding.co.uk/
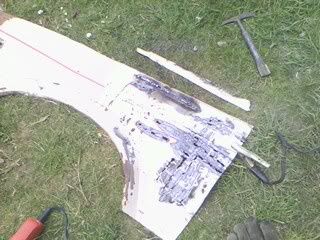
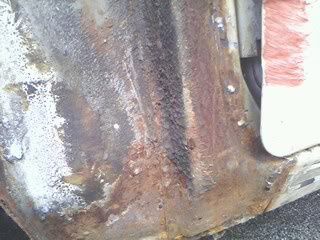
After looking at the tutorials, there was nothing left but to grab the wing I cut off yesterday and "have a go" ............with mixed results.
Now my first mistake (I've since found out) is that I am using an arc welder. However, cosidering the financial situation and it was loaned free of charge, I can't really complain.
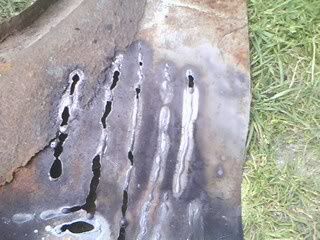
If the object of the excercise was to blow holes in the metal...................I'd have done really well!!!

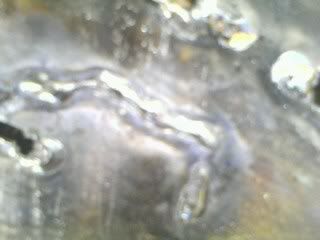
I did manage to get some actual welds.
Ad here.
Not looking quite so bad from the "wrong" side.
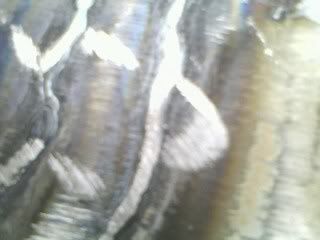
Try welding 2 bits together I was told (from the guy who I borrowed the welder from) You might find it easier.
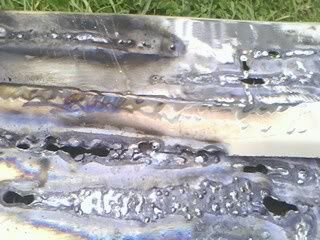
A little bit better.
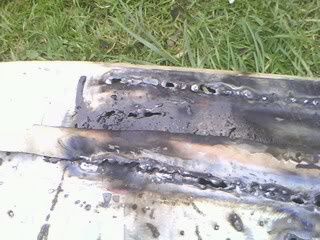
On the positive, although it is not a very nice looking job, I did actually manage to stick one bit of metal to the other without it falling off. To be fair this is the standard of welding that was already on the car and the guy gave up.
 Copyright AdamG
Not sure what he was welding with be it mig or arc, but it is very rough and lumpy. Bottom line is that piece has to be cut out and I'll have to start again
Following a link from the Lada forum, I found this site
http://www.mig-welding.co.uk/
After looking at the tutorials, there was nothing left but to grab the wing I cut off yesterday and "have a go" ............with mixed results.
Now my first mistake (I've since found out) is that I am using an arc welder. However, cosidering the financial situation and it was loaned free of charge, I can't really complain.
If the object of the excercise was to blow holes in the metal...................I'd have done really well!!!
I did manage to get some actual welds.
Ad here.
Not looking quite so bad from the "wrong" side.

Try welding 2 bits together I was told (from the guy who I borrowed the welder from) You might find it easier.
A little bit better.
On the positive, although it is not a very nice looking job, I did actually manage to stick one bit of metal to the other without it falling off. To be fair this is the standard of welding that was already on the car and the guy gave up.
Not sure what he was welding with be it mig or arc, but it is very rough and lumpy. Bottom line is that piece has to be cut out and I'll have to start again
Tuesday, May 31, 2011
Slow progress
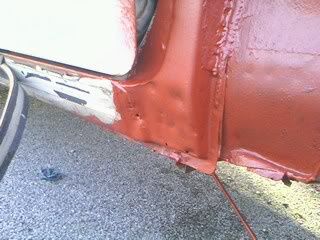
As I said yesterday, I had to go out and protect the other side of the car, so the sun was shining, out came the wire brush, curerust and red primer and the passenger side was attacked.
Not as well covered or neat as I would have liked.......I was running out of paint
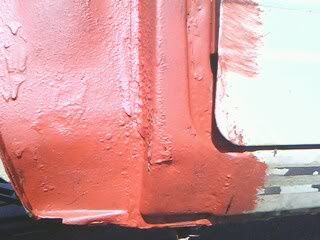
I've remembered to do the bit at the top of the inner wing that I missed on the other side.
So, I had to go and do the bit I missed..........to be fair, I hadn't forgotten, there was still a bit of wing in the way.
Only a couple of hours on the car today........I've now run out of curerust and primer!
Progress is going to be very slow from now on. I've pretty much run out of jobs to do until I either
1\ Order some parts from www.lada.co.uk (this requires having some money)
2\ Practice my welding skills till I am confident enough to actually risk using them on the car.
I have been putting that off because of the fear of the unknown..........what if I am totally crap at it? Having to pay someone to do the welding would just about kill this project and I've put to much time and effort into it already. (Not that you would think so looking at the pictures.....It looks like I have just ripped parts off.
It might be a while before I update this blog again..............depends how I get on with the welding
Monday, May 30, 2011
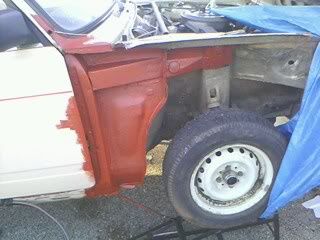
Back to wrecking me 'ansomes
Bank holiday monday dawned in typical fashion...............cold, we and drizzly. So whats new there then.

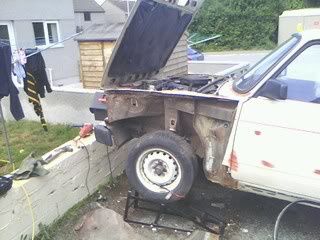
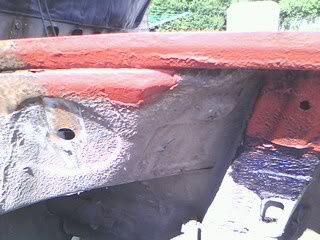
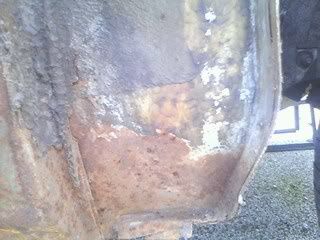
As on the other side, the inner wing where it meets the sill is in quite good nick, and not a pile of rusty powder as was expected (and suggested by other forum members)
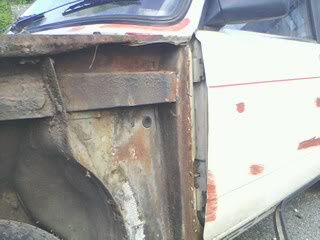
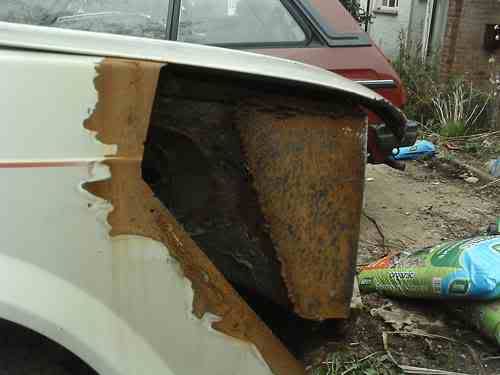
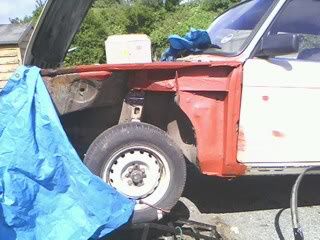
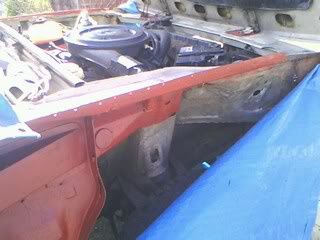
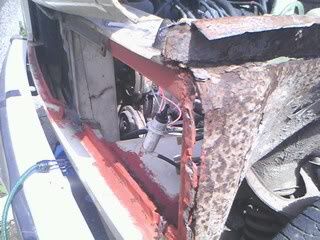
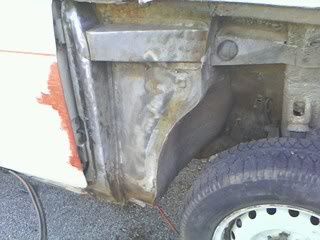
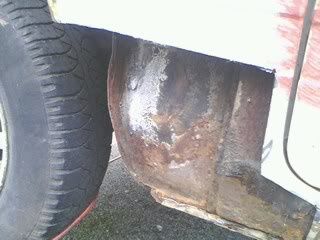
Now I should have expected this, since the other side was the same, but it was still a big disappointment to discover that the front of the passenger side inner wing was shot.
Look mum..............daylight.
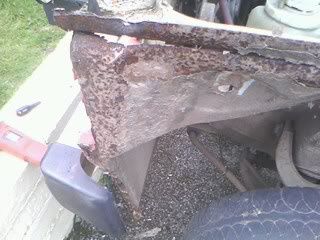
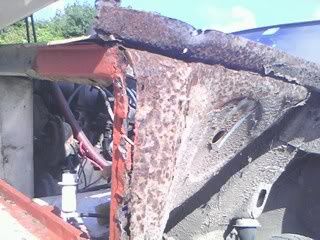
And it gets worse around the front........will definatly have to do something there.......plan B time me thinks.......
Yeah..............definatly plan B............which is to decide what plan C will be
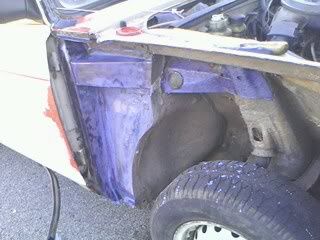
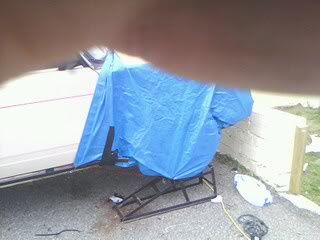
Well, time to button up for the night as I was getting cheesed off by this point. Look mum, matching blue covers
Weather permitting, I need to get out there with the wire brush, curerust and red oxide primer and match it up to the other side. Provided I've enough curerust and primer left.
I've definatly got to stop putting off attempting to use the welder (practice) as I am running out of jobs to do without needing parts!!!
Well at about lunctime it started to clear up and this mysterious yellow ball appeared in this unusually blue sky..........Well, I'd better crack on and do something to the lada then!!!!:-)
First job was to remove the top edge of the drivers wing that I'd left in place last time. Plan A was to try and drill out the spot welds.
When that failed, breaking a drill bit in the process (What do they weld with in Russia?) It was back to good old fashioned hammer and chisel!!!!!!
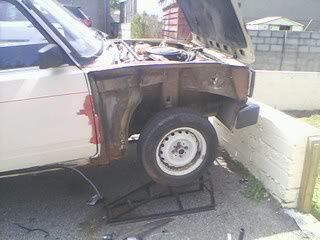
With that done (taking a bit longer than I thought) It was time to have a go at the other side. It had to be done sooner or later and as you will have seen from an earlier post......they were done sooner than planned.
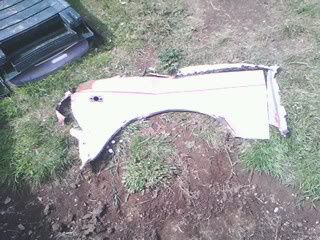
Now, I had planned to go softly softly and try and remove the passenger wing with the hammer and chisel.................Yeah right after about 15 mins out came the angle grinder again.
The removed wing in its various componant states.............which means it came off in about 5 bits.
Now I should have expected this, since the other side was the same, but it was still a big disappointment to discover that the front of the passenger side inner wing was shot.
Look mum..............daylight.
And it gets worse around the front........will definatly have to do something there.......plan B time me thinks.......
Yeah..............definatly plan B............which is to decide what plan C will be
Well, time to button up for the night as I was getting cheesed off by this point. Look mum, matching blue covers
Weather permitting, I need to get out there with the wire brush, curerust and red oxide primer and match it up to the other side. Provided I've enough curerust and primer left.
I've definatly got to stop putting off attempting to use the welder (practice) as I am running out of jobs to do without needing parts!!!
Friday, May 27, 2011
At last something positive
When we last left, the plan was to go out with the wire brush, curerust and the primer the next day. Well for reasons I won't go into that didn't quite happen.
It was a week later (to the day) before I managed to do anything on the car. The first job was the new hammer and chisel to try and get the remaining bits of wing off.
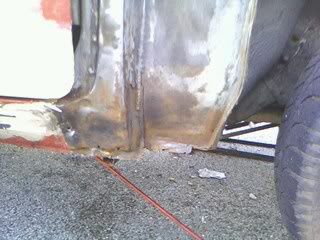
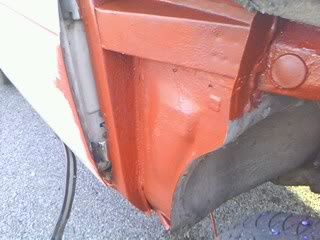
As you can see, the inner wing is actually quite sound where it meets the sill, not requireing any extra welding there then :-)
When that had done its thing, time to get the red oxide primer on. Might not be everyone's cup of tea, but I have been using it on preserved railways for years so I know it is good stuff!!!
After letting that dry, it was time to cover up for the night. As you can see from picture 3 I still have some wing to take off, but time was getting on so I left that for another day (Tomorrow????)
And I've still got to have a go at this welding lark to see if I can do it
Thursday, May 26, 2011
Part 5
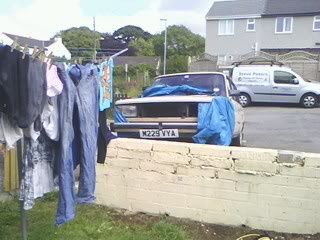
Having seen the price of Lada's lately (in particular Larry on ebay) I thought it was time to install an anti theft device in the Kernow Riva
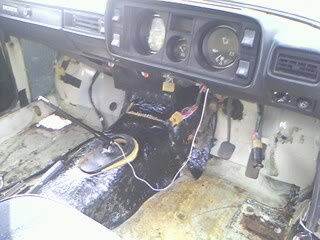
In reality, I had to get it apart because of the cracked steering column bracket
Recieved some news today that was not what we were expecting (which puts more of a delay on ordering parts from www.lada.co.uk
Added to that a load of hassle yesterday when we were told our benefit was stopped because of a cock up in the system (not our fault and all sorted now)
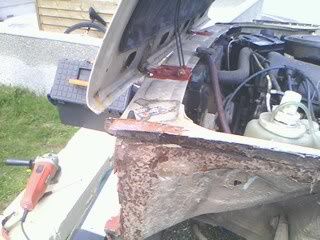
Anyway I was feeling the need to take out my aggression on something...............So one of the jobs on the Riva was moved forward, and I attacked it with the angle grinder!!!!!!!!!
I need to get a new hammer and chisel plus some metal drill bits and spend the next few days and weeks chiseling the remaining bits off. (well I do have all the time in the world)
Following advice from, another forum member I was expecting to find the bottom of the inner wing (where it meets the sill) to be a crumbling mess.
This was what I found
Curiosity got the better of me, so I cut a bit out of the other side to check that as well.
They are both intact..........Yippeee
Temper cooled, Time to button up against the weather cos It was time to get the kids from school.

Tomorrows job will be to attack with a wire brush, curust and a coat of primer on those inner wings.
At least I've got some more scrap metal to practice my arc welding on
In reality, I had to get it apart because of the cracked steering column bracket
Recieved some news today that was not what we were expecting (which puts more of a delay on ordering parts from www.lada.co.uk
Added to that a load of hassle yesterday when we were told our benefit was stopped because of a cock up in the system (not our fault and all sorted now)
Anyway I was feeling the need to take out my aggression on something...............So one of the jobs on the Riva was moved forward, and I attacked it with the angle grinder!!!!!!!!!
I need to get a new hammer and chisel plus some metal drill bits and spend the next few days and weeks chiseling the remaining bits off. (well I do have all the time in the world)
Following advice from, another forum member I was expecting to find the bottom of the inner wing (where it meets the sill) to be a crumbling mess.
This was what I found
Curiosity got the better of me, so I cut a bit out of the other side to check that as well.
They are both intact..........Yippeee
Temper cooled, Time to button up against the weather cos It was time to get the kids from school.
Tomorrows job will be to attack with a wire brush, curust and a coat of primer on those inner wings.
At least I've got some more scrap metal to practice my arc welding on
Subscribe to:
Posts (Atom)